My name is Sarah Buchanan and I graduated from the University of Houston in December 2015 with a BS in Geology. Post graduation, I moved out to the hill country in Texas and worked on a Google Maps project. This experience really inspired me to go back to school and get certified in GIS. I chose the University of West Florida for it's completely online program, affordability, and great reviews. I began the Master's Certificate in GIS program in January 2018. I have to complete this course and the Special Topics course and I will be finished. It has taken me longer than I wanted because of some life circumstances and of course, money, but I have been very satisfied with the choice I made. I have worked in three GIS positions since Google and currently work as a GIS Specialist for a great company, CHA Consulting. I love my job-I get to make maps and perform higher level data and spatial analysis than the previous GIS jobs. I am excited to see where my career path takes me and where the advancements in and from GIS take the world! Below is my story map..check it out!
https://arcg.is/0rbf1K0
Saturday, June 27, 2020
Wednesday, June 24, 2020
Writing Geometries
The final module for this course was about writing geometries. We explored using cursors to return point objects (single point features), an array of points (polygons, polylines), and using using for and nested loops to write to text files. I want to note the key issues I had with this module. For the most part, I was able to follow the exercise and extract what I needed from there. My first error encounter had to do with my search cursor statement. I was writing “NAME@” and receiving a column type error. After researching on Esri forums, I decided to take out the @ sign and my code would execute properly after that. The next issue I had was the v += 1 statement was not returning the vertex id’s in sequential numbering. This was because I was not including it in the for loop, so once I indented it, it executed perfectly. The last issue I had was getting everything to write to my .txt file. I was getting 25 lines of random vertices from each OID. This was another indentation issue. Once I included in the for loop, it executed perfectly and my assignment was finished!


Wednesday, June 17, 2020
Exploring & Manipulating Data
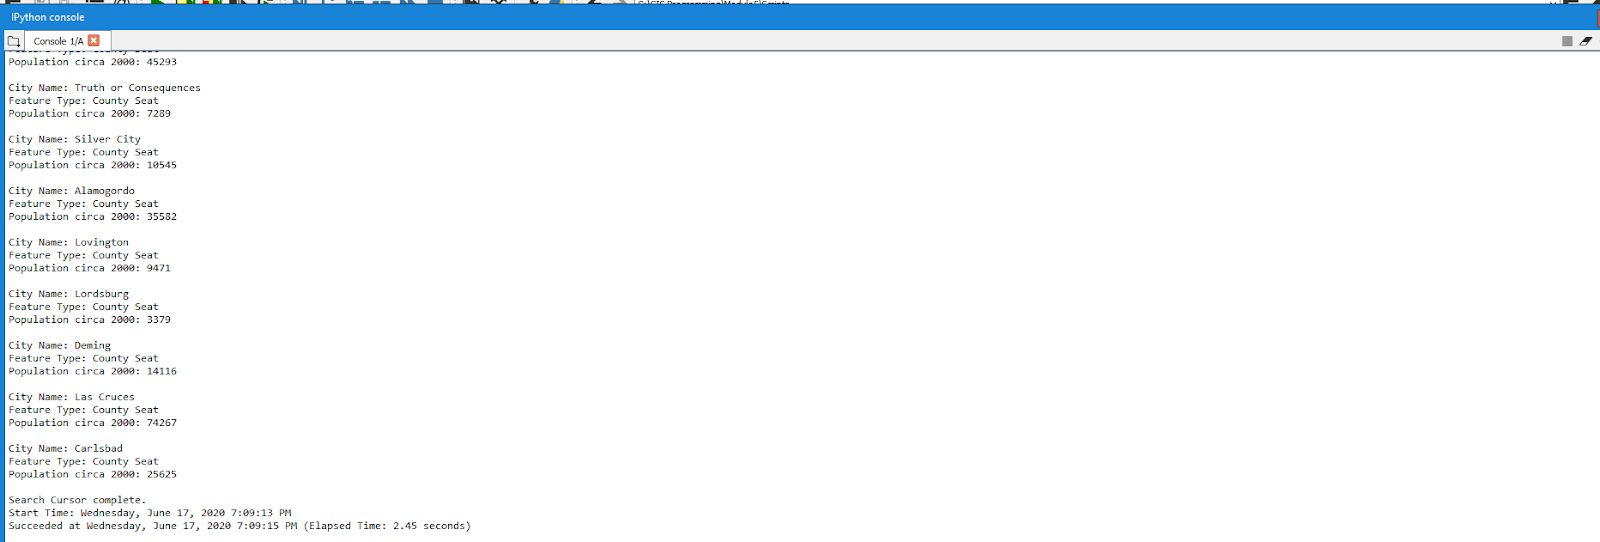
Just like the title implies, this week we explored ways to manipulate spatial data. This assignment tasked us to work with search cursors, lists, dictionaries, and display correct usage of update and insert cursors. The most challenging aspect in this lab was creating a for loop on the search cursor and dictionary. I had to correct many mistakes and try different ways until I finally had a script I felt good about. I guess that's the entire point of the assignment-learning how to manipulate data to return the desired output. There are multiple ways to do this and I actually discovered two ways to return the same statement on the dictionary by using two different scripts. Now, that was discovered through trial and error, not first hand knowledge on my part. But I appreciate challenges like that because I feel like it helps build stronger technical skills. Below are screenshots of the script I created and a flowchart!


Wednesday, June 10, 2020
Geoprocessing
For this week's module, I used ModelBuilder and Python 3 to perform geoprocessing analysis. Through the geoprocessing pane, I created a toolbox and model to perform a clip, select, and erase model that erased all "not prime farmland" soil from the basin shapefile. I also had to write a geoprocessing script without the aid of a template. Since
I was creating my script in Spyder, I knew I had to set my workspace
accordingly since it was a stand alone script. This meant I had to import
arcpy, then from arcpy import env, and set the workspace. I created the rest of
the script by following the stand alone guide on ArcGIS Pro Tool Reference page
for XY Coordinates. I also had to create a 1000 meter buffer around the hospital shapefile and dissolve the buffers into a separate, single feature. This script was actually very easy to write because the exercise completely prepared me. I also think I am starting to understand some of the syntax to follow and what arcpy functions to use. It was pretty cool to explore the different ways to use Python and ArcPro to perform geoprocessing analysis. Below is an example of the script I wrote and the messages I had to print out.

Wednesday, June 3, 2020
Debugging and Error Handling
This week our module covered debugging and error handling. This is perhaps one of the most important topics on the pathway to becoming a great programmer. There are a multitude of errors you will run into, so having the knowledge to fix them is astute. We were required to produce three debugging scripts with the last one including a try except statement.
In the first script, I had to identify two errors and fix them so the script would run. The successful script had to print out the names of the fields in the park.shp attribute table. Below is a copy of what my script looked like when it ran successfully.

In the second script, I had to identify 8 errors and fix them so the script would run. The successful script had to printout all the names of the layers in the project. The errors were mainly syntax errors and I was able to execute it in the same amount of time as I did the first script, around 15 minutes. Below is a copy of the script ran in the console pane.

The third and last script was the most complicated. It certainly did not take me 15 minutes like the other two. The script has two parts: A and B. Both parts must run in the final script. Part A should encounter an error and print an error statement stating the problem. Part B should run successfully, printing out the name, data source, and the spatial reference of each layer. The successful script should run both parts, returning an error message for Part A and printing three sets of messages for Part B. We were introduced to executing this by inserting a try except statement. I was able to identify the error in Part A very quickly by running the IPython debugger tool. It did take a while to locate where the try except statement should go and I did understand the correct syntax and indentation to occur. My biggest challenge was figuring out what the except statement was. I kept trying to make it more complex than it needed to be. Trust me, it is a simple except statement. Below is an example of the script ran in the console pane and a flowchart.


Subscribe to:
Comments (Atom)